
Introduction
You send your manufacturer a sketch and say "make this hoodie." They respond with twenty questions: What GSM? What fabric composition? What measurements for each size? What's the rib specification? Thread color? Label placement?
You didn't realize a hoodie required so many decisions.
This is where tech packs come in. A tech pack is the blueprint that tells your manufacturer exactly what to make. Without one, you're hoping they read your mind. With a proper tech pack, you get exactly what you envisioned.
This guide explains what a tech pack is, what information it should contain, and how to create one even if you have no design background.
What Is a Tech Pack?
A tech pack (technical package or specification sheet) is a document that contains every detail needed to manufacture your product. It's the instruction manual that travels with your design from concept to finished product.
A complete tech pack typically includes:
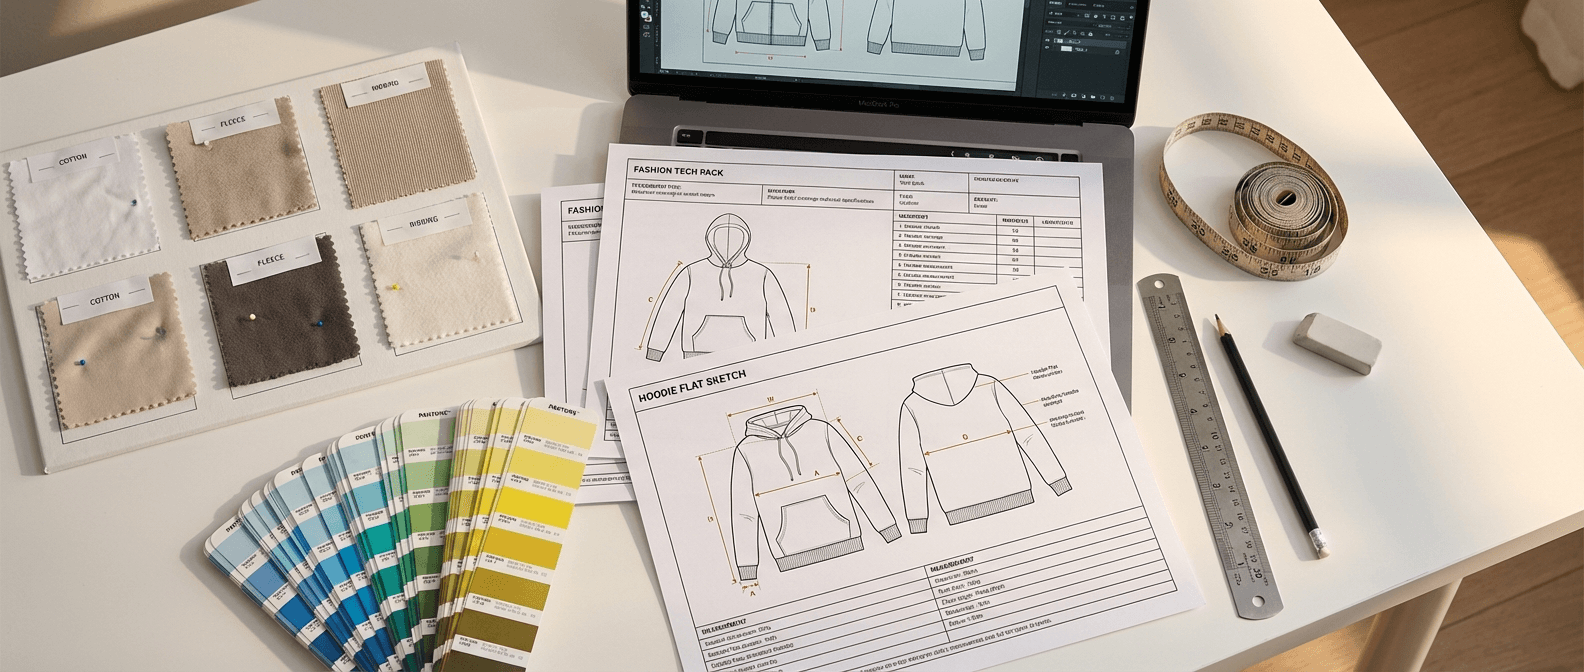
Design sketches with annotations. Measurements for every size. Fabric specifications. Color references. Construction details. Trim specifications (labels, tags, zippers). Print or embroidery placement guides. Packaging requirements.
Think of it as the difference between telling someone "build me a house" versus giving them architectural blueprints. The tech pack is your blueprint.
Why Tech Packs Matter
Accuracy
Without specifications, manufacturers make assumptions. Their assumption about sleeve length might differ from yours by two inches. A tech pack eliminates assumptions.
Consistency
If you reorder the same product later, the tech pack ensures you get identical results. No "this batch looks different" surprises.
Communication
Tech packs transcend language barriers. Even if your manufacturer's English is limited, clear measurements and visual references communicate precisely.
Cost Accuracy
Manufacturers quote based on specifications. Vague requests get padded quotes to cover unknowns. Detailed tech packs get accurate quotes.
Time Savings
Back-and-forth questions delay production. A complete tech pack answers questions before they're asked.
Quality Control
Tech packs become the reference for quality inspection. "Is this correct?" has a clear answer when specifications exist.
Anatomy of a Tech Pack
Let's break down each section of a complete tech pack.
Section 1: Cover Page / Overview
What to include:
Brand name and logo. Style name and style number (create a system, e.g., "HL-001" for Hoodie Line #1). Season or collection name. Date and version number. Designer or contact name.
Why it matters:
Organization. When you have 20 products in development, clear identification prevents confusion.
Section 2: Flat Sketches
What to include:
Front view sketch of the garment. Back view sketch. Side view if relevant. Close-up views of special details (pockets, collar, cuffs). All features labeled with callouts.
How to create:
Professional option: Adobe Illustrator vector drawings. DIY option: Hand sketches photographed clearly, or free tools like Canva or Figma. Reference option: Photos of existing similar garments with your modifications noted.
Key annotations to include:
Stitch types (single needle, double needle, coverlock). Seam placements. Pocket dimensions and placement. Opening types (zipper, buttons, pullover). Special features (thumbholes, hidden pockets, reflective elements).
Section 3: Bill of Materials (BOM)
What to include:
Every material that goes into the product:
- Main fabric: Type, composition, weight (GSM), color, finish
- Secondary fabric: If applicable (lining, panels)
- Ribbing: Composition, weight, dimensions
- Thread: Color(s), type
- Zipper: Type, length, brand if specific
- Drawcord: Material, length, end type (metal tips, knots)
- Labels: Neck label, care label, size label specifications
- Hang tags: Dimensions, design reference
- Packaging: Poly bag specifications, tissue paper, etc.
Example entry:
Main Body Fabric:
- Type: Brushed Fleece
- Composition: 80% Cotton / 20% Polyester
- Weight: 340 GSM
- Color: Black (Pantone 19-4005 TCX)
- Finish: Enzyme wash for softness
Section 4: Colorways
What to include:
Every color option you want produced. Color references for each element (body, rib, thread, zipper).
How to specify colors:
- Pantone reference: Most accurate. "Pantone 19-4005 TCX" gives exact color matching.
- Fabric swatch: Physical sample attached or high-quality photo.
- Reference image: Photo of existing product in desired color (less accurate but helpful).
Example colorway specification:
Colorway 1: "Midnight"
- Body: Pantone 19-4005 TCX (Navy)
- Rib: Pantone 19-4005 TCX (Same as body)
- Thread: Navy (match body)
- Zipper: Black matte
- Drawcord: Navy (match body)
- Neck label: White background, navy print
Section 5: Measurements (Size Spec Sheet)
This is often the most critical section. Incorrect measurements mean products that don't fit.
What to include:
Measurement chart showing every dimension for every size.
Key measurements for tops (t-shirts, hoodies, sweatshirts):
- A - Total Length: From highest point of shoulder to bottom hem
- B - Chest Width: Armpit to armpit, laid flat
- C - Bottom Width: Hem width, laid flat
- D - Sleeve Length: From shoulder seam to cuff
- E - Shoulder Width: Seam to seam across back
- F - Armhole Depth: From shoulder seam to armpit
- G - Neck Width: Opening width at neck
- H - Neck Drop (Front): From shoulder to front neck opening
- I - Neck Drop (Back): From shoulder to back neck opening
- J - Cuff Opening: Width at sleeve cuff
- K - Rib Length: For bottom rib band
Example measurement chart:
| Point | Description | S | M | L | XL | 2XL |
|---|---|---|---|---|---|---|
| A | Total Length | 68cm | 70cm | 72cm | 74cm | 76cm |
| B | Chest Width | 51cm | 54cm | 57cm | 60cm | 63cm |
| C | Bottom Width | 49cm | 52cm | 55cm | 58cm | 61cm |
| D | Sleeve Length | 62cm | 64cm | 66cm | 68cm | 70cm |
| E | Shoulder Width | 46cm | 48cm | 50cm | 52cm | 54cm |
Tolerance:
Include acceptable tolerance (usually ± 1-2 cm). "Chest width: 54cm ± 1cm" means 53-55cm is acceptable.
Section 6: Construction Details
What to include:
How the garment should be assembled. Stitch types and locations. Seam allowances. Bartacks and reinforcement points.
Common construction callouts:
- Shoulder seam: Straight stitch, taped for reinforcement
- Side seams: 4-thread overlock
- Hem: 1" double-needle coverstitch
- Cuff: 1" coverlock with rib attachment
- Pocket opening: Bartack reinforcement at corners
- Neck: Coverstitched with neck tape
Section 7: Print/Embroidery Specifications
What to include:
Artwork file (vector format preferred — AI, EPS, PDF). Print method (screen print, DTG, embroidery, heat transfer). Size of design (width × height). Placement (distance from collar, center chest, etc.). Colors in design with Pantone references.
Placement guide example:
Front Chest Logo:
- Size: 8cm width × 5cm height
- Placement: Center chest, 8cm below neckline seam
- Method: Screen print, 1 color
- Color: White (on black body) / Black (on white body)
Back Print:
- Size: 28cm width × 35cm height
- Placement: Center back, 5cm below neck seam
- Method: DTG print, full color
- File: back_design_v2.ai
Section 8: Labels and Packaging
What to include:
- Neck label: Dimensions, material, print colors, attachment method
- Care label: Content, washing instructions, country of origin, legal requirements
- Hang tags: Size, design, attachment method
- Size labels: Style (printed on main label or separate woven tab)
- Packaging: Poly bag specs, folding method, tissue paper, stickers
Example:
Neck Label:
- Size: 4cm × 2cm
- Material: Satin woven
- Content: Brand logo + size
- Attachment: Center back, sewn into neck seam
Care Label:
- Size: 3cm × 5cm
- Material: Printed satin
- Content: Fiber composition, care symbols, country of origin
- Attachment: Left side seam, 15cm from bottom hem
- Requirements: Must meet US FTC labeling requirements
Packaging:
- Individual poly bag: 30cm × 40cm, 0.04mm thickness
- Suffocation warning printed on bag
- Fold: Half fold, front facing up
- Size sticker on outside of bag
Creating a Tech Pack Without Design Experience
You don't need to be a designer to create a functional tech pack.
Option 1: Use Templates
Google "tech pack template free" — many are available. Fill in specifications based on reference products.
Option 2: Reference Existing Products
Buy a product similar to what you want. Measure every dimension. Photograph every detail. Use these as your reference points.
Option 3: Let Your Manufacturer Help
Many manufacturers can create tech packs from your concepts. You provide: sketches, reference images, general description. They create: proper technical documentation. Cost: Usually $50-200 depending on complexity.
Option 4: Hire a Freelancer
Platforms like Upwork and Fiverr have tech pack specialists. Typical cost: $100-400 for a complete tech pack. Worth it for complex designs or if you're creating many products.
Common Tech Pack Mistakes
Mistake 1: Missing Measurements
"Medium size" means different things to different people. Always provide specific measurements, not just size labels.
Mistake 2: Vague Color References
"Navy blue" can be 50 different shades. Use Pantone references or physical swatches for accuracy.
Mistake 3: Forgetting Tolerances
Manufacturers need to know acceptable variation. Without tolerances, quality inspection has no standards.
Mistake 4: Incomplete Label Information
Care labels have legal requirements that vary by country. Missing required information can prevent sale in certain markets.
Mistake 5: Low-Resolution Artwork
Print-ready artwork should be vector format (AI, EPS) or minimum 300 DPI at print size. Low-resolution images produce poor prints.
Mistake 6: Not Including Grading
If you only provide Medium measurements, manufacturer must guess other sizes. Always include complete size range.
Mistake 7: No Version Control
When you revise the tech pack, update the version number and date. This prevents confusion about which specifications are current.
Tech Pack Checklist
Before sending to manufacturer, verify your tech pack includes:
Cover Page:
- ☐ Brand name and style number
- ☐ Date and version number
- ☐ Contact information
Visuals:
- ☐ Front and back flat sketches
- ☐ Detail views for special features
- ☐ All elements labeled
Materials:
- ☐ Main fabric specification (type, weight, composition, color)
- ☐ Secondary materials (rib, lining)
- ☐ All trims (zipper, drawcord, buttons)
Colors:
- ☐ Pantone references or physical swatches
- ☐ All colorways fully specified
Measurements:
- ☐ Complete measurement chart for all sizes
- ☐ Measurement diagram showing what each point measures
- ☐ Tolerances specified
Construction:
- ☐ Stitch types and locations
- ☐ Seam specifications
- ☐ Special construction details
Artwork:
- ☐ Print/embroidery files (vector or high-resolution)
- ☐ Size and placement specifications
- ☐ Color specifications for artwork
Labels and Packaging:
- ☐ All label specifications
- ☐ Care instruction content
- ☐ Packaging requirements
Working with Qumash Lab
We work with all levels of tech pack preparedness:
- Complete Tech Pack: You provide full specifications, we manufacture to exact specs.
- Partial Tech Pack: You provide design and key specifications, we fill in standard manufacturing details.
- Concept Only: You provide sketches and ideas, we help develop complete technical specifications.
For brands without tech packs, we offer tech pack development as a service. We'll measure reference garments, create specifications, and provide a document you can use for future orders with any manufacturer.
Our sampling process also refines tech packs — we catch specification issues during samples so production runs perfectly.
Conclusion
A tech pack is the bridge between your vision and the finished product. The more complete and accurate your tech pack, the closer the result matches your expectations.
Key principles:
Be specific — vague descriptions create assumptions. Use references — Pantone codes, measurements in cm/inches, reference images. Include everything — if you have a preference, document it. Version control — date and number every revision. When in doubt, ask — manufacturers prefer questions before production, not complaints after.
Creating your first tech pack takes time. But once you have a template that works, future products become much faster to specify. Invest the effort upfront, and manufacturing becomes dramatically smoother.
Need help creating your tech pack? We offer tech pack development services and can work from your concepts to create production-ready specifications. Or send us your existing tech pack for a quote — we'll let you know if anything is missing.